Hp printers are known for their great print quality and the effortless printing speed. Once you have got your hands on the HP printers you will be able to achieve clear quality prints. The device and machinery are known as the best if they stand the test of time. Just like any other printer, the HP printers will also face the issue of laser toner leaks and the HP color laserjet 2600n printer troubleshooting print quality problems. In case you are facing such an issue, we have the following solutions for you fix your printer at one go and get back to business.
Why is my HP printer showcasing laserjet 2600n print quality problems?
Before you try to fix the print quality problems in HP laserjet 2600n you should know what are the causes of your printer throwing tantrums. There can be more than one reason behind the rise of this problem. It varies from printer to printer and even user to user.
Defective PS5 sensor
Defective cooling fans
Open cover
Fault installation of the toners
Hardware issues
What to do if the HP colour laserjet 2600n printer troubleshooting print quality problems?
The below-mentioned solutions will help you get rid of this issue in a jiffy:
Solution:
Before beginning, make sure that you turn the printer Off. You may also disconnect the printer and unplug all the plugged wires
Next, you will have to open the front door of the printer and remove the cartridge. As most of the laser printers have loose toner. It also holds a very finely milled vibrant powder that has the ability to spread in the unwanted areas and spoil the major working areas
Once you have removed the cartridge, you can now place it in a clean and safe place
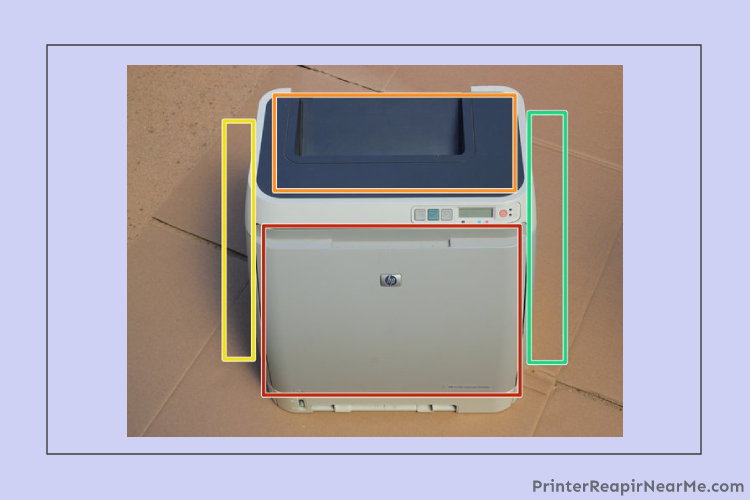
After this, you have to place your printer falt on the ground. While placing is down make sure that the right side of the printer is on the ground. (while facing the printer towards you, upright you will be able to spot the right side of it and place it according to the instructions)
Now that you have placed it as instructed, you may take out the printer paper tray from the printer’s bottom
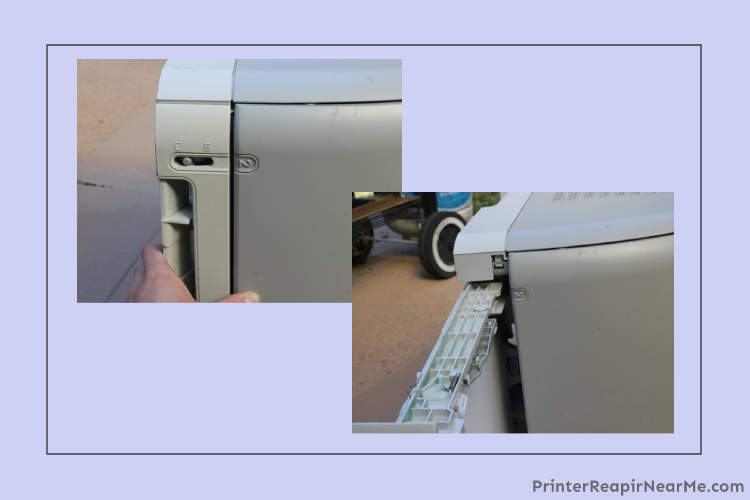
If you notice carefully, the printer will have tabs on the sides. You will have to press them or lift them. It is not necessary that the tabs are within your reach always, the tabs are sometimes difficult to press with a finger, for which you can do the same with the help of a screwdriver
Once you have targeted the tabs, you may now lift the base cover. In case it feels something is holding it up, you should check for more tabs in the cover. If you locate more tabs, make sure to lift or press them to lift the base cover entirely
There will be the tab fasteners that need to release. While doing so, release the left side tab fasteners.
After this, you will be able to remove the left side base cover. It is advisable to keep a track on the extra tabs because it will help you while you will be resembling the printer
Just rotate the printer to the back and place it flat on the ground.
There are screws on each side of the printer, which needs to be unscrewed for the execution of the next steps
On unscrewing the screws, you will be able to press the tabs on the right side and lift the base cover.
Make sure to look for tabs inside the printer that needs to be released to remove the base cover entirely
After that, you can remove the base cover and cover of the printer. Make sure to look for tabs carefully, as even one of the snapped tabs can damage the cover if not unsnapped
Once you have removed the screws. Remove the back cover of the printer
Now that you have an exposed printer in front of you, make sure not to unplug any vital wire or connection and accelerate the problem
Carefully execute the steps related to any wire. As any absent-minded step will damage the wires
You will be able to spot the ribbon wire which needs to be removed along the cable
Look for a white connector. Once you spot it, remove it by pushing it down once and pulling it back
There will be a few purple wire connectors that need to be pulled out. You don’t have to worry about keeping a track of the wires for reconnecting as they all are of unique sizes.
Look the circuit board assembly carefully and spot the four ribbon cable. Once you spot it, remove them gently
You will also have to remove the final two wires directly
Locate the black harness on the right and top corner of your HP printer. Make sure to unwire the cables from that harness
After doing so, you may now remove the wiring harness on the corner as well from the circuit board assembly
Move the harness towards the left side and make sure to remove it from the circuit board assembly
Most probably there will eleven M3 screws inside which are needed to be unscrewed now
Now remove the entire circuit board assembly from the printer. Make sure to be careful while handling this one
After that, you will be able to have a sight of the optical sub-assembly. You just need to remove the two ribbon cables from that as well. You will have to be extra careful with these wires as the ribbon wires are quite fragile and finding a replacement will create an issue
Now you have to tilt the printer forward and remove the screw that is placed on the bottom of the printer
If you were able to make it till here, you will have to set back the printer now. Before that make sure to remove two more screws that are screwed to the lock-washers.
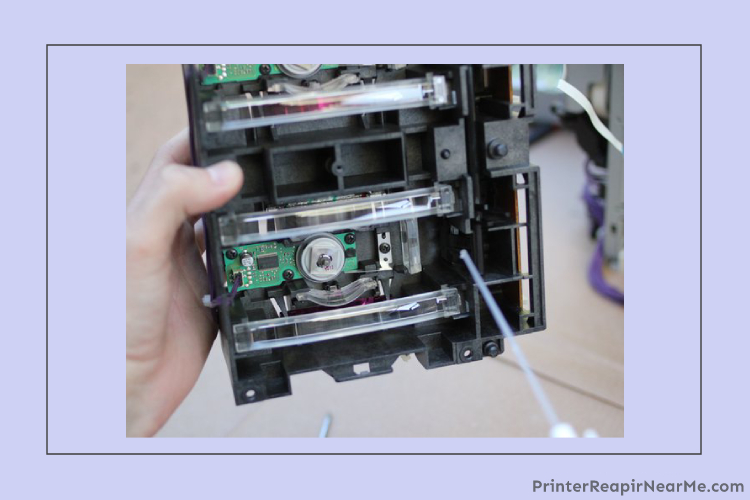
On doing this, you will be able to remove the optical sub-assembly. The optical sub-assembly is the main part of the printer that needs to repair to get rid of the issue.
Once you have your hands on the optical assembly, you can now place it in front of you to start its repair
Firstly, remove the black screw
Look for the spring and unhook it
The top plate that is placed in the optical sub-assembly, needs to be removed as well
On removing all this, you will be able to spot the clear and reflecting sides which need to be cleaned with the help of a dry and gentle cotton swab or even a lense brush
While cleaning it, make sure not to scratch the surface
Once you are done with the gentle cleaning, throw a light blast of compressed air on the cleaned surface
Now you just have to reassemble the printer and you will achieve a flawless working printer
To reassemble the printer yourself, you can now do all the aforementioned steps in reverse order.
It is advisable to perform the aforementioned steps carefully as any leniency will lead to serious damage to the printer. You may have to get in touch with some experts that are available at the Printerrepairnearme.com. The professional technician will provide the best printer repair services and get rid of this HP error.